


How to customize Sculpting Foam with Distress Inks
Spring and summer usher in my favorite thing of the year: wildflowers! Here in California the hills are a wild, vibrant array of blooms that make the fields and mountains sing with color. I wanted to be able to capture the bright hues that dot the hills and thought it could be fun to test using Distress Inks as a way to color our white sculpting foam. I can't lie...I loved how they turned out.
I choose to use foam as it can be manipulated with a heat tool or without by using paper sculpting tools and your own fingers, all to create realistic texture on die cut petals. Being able to customize the bloom for my house and capture the colors of the local wildflowers was the perfect way to spruce up a some of my bud vases throughout the house.

What you will need:
- Sizzix® Big Shot® Machine (660200)
- Sizzix® Bigz® Die - 3-D Wildflowers (665192)
- Sizzix Accessory - Glue Gun
- Sizzix Accessory - Glue Gun Sticks, 4, Clear, 12PK (664821)
- Sizzix Making Tool - Paper Sculpting Kit (662225)
- Sizzix Making Tool - Multi-Tool Starter Kit (662875)
- Sizzix Multi-Tool Accessory - Blending Tool Head w/Replacement Sponge (662880)
- Sizzix® Surfacez - 12 Sculpting Foam, Bouquet, 5 Sheets (664608)
- Ranger® Distress® Ink Pads (Blueprint Sketch, Mustard Seed, Shaded Lilac)
- Floral Tape
- Floral Wire
- Wire Cutters
- Wooden Beads
- Vase

How to make:
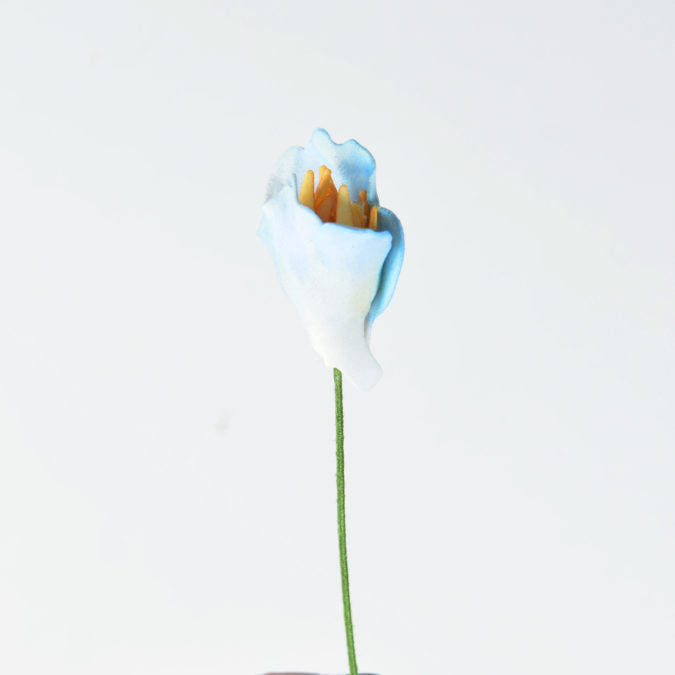
- Die-cut out of white sculpting foam 6-8 small flower petals and out of cream sculpting foam 4-5 flower centers from the 3-D Wildflowers Bigz die. The beauty of Bigz dies is that you can cut multiple layers of foam at the same time, cutting down on project creation time.

2. With a blending tool, ink the flower petals and flower centers with desired ink colors, blending shades together to create realistic color patterns. For the violet flowers I used a blend of Shaded Lilac and Blueprint Sketch. I also wanted to create some yellow flowers and used blends of Mustard Seed, Wild Honey and Carved Pumpkin.


3. Add texture to individual petals by pleating the top edge of the petal and then twisting the pleated portion between two fingers to create a realistic texture on each petal. You can also twist the pointed tips of the flower centers to create extra texture.

4. With the stylus tools and the gray molding mat create further dimension by applying pressure with the stylus heads to the bottom areas of the flower petals to form curved petals.

5. Cut a piece of floral wire sized to fit into a vase of choice. Adhere a wooden bead to one end of the floral wire with hot glue.

6. Adhere the flower centers around the wood ball with hot glue until it is completely covered, alternating the shapes to create a spiky floral center.

7. Adhere 2-3 flower petals around the flower center with hot glue, overlapping the petals to create a tight fit around the flower center. Adhere the remaining petals around the other petals in various places to create a full flower.
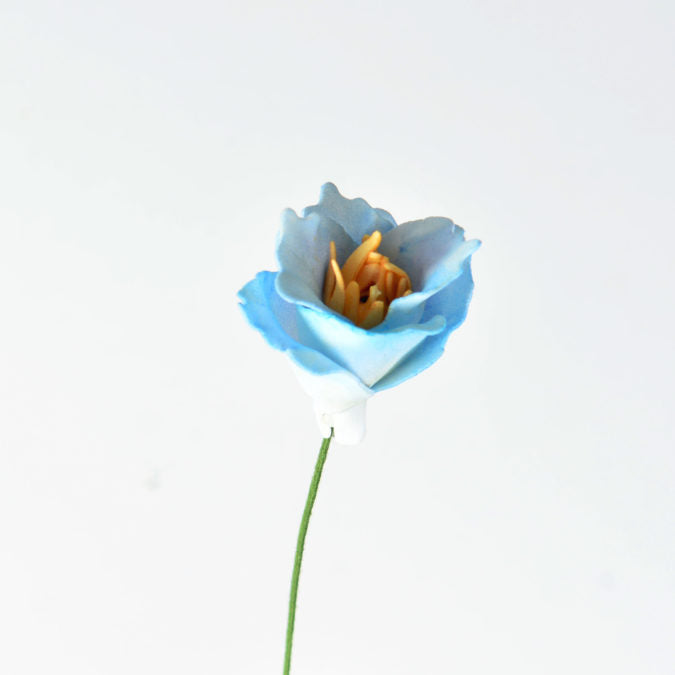
8. Tightly wrap floral tape to the base of the flower petals and continue wrapping the tape down the remainder of the floral wire.

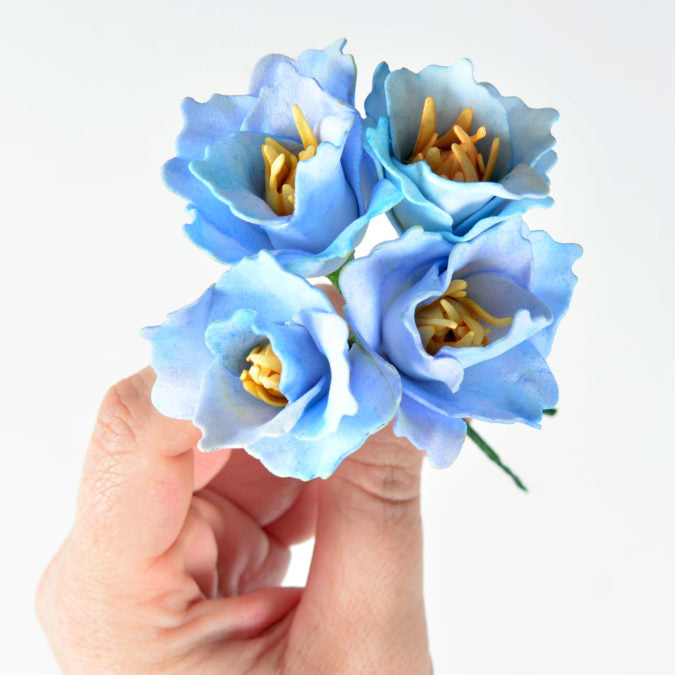
9. Add all flowers into a vase of choice.

I hope you enjoyed this tutorial and feel inspired to create your own custom blooms for your home this spring and summer seasons!
Remember to tag us in your makes using the hashtag #mymakingstory, we love to see your creations!


