


Do the Next Thing! Tim Holtz Inspired Make...
At Sizzix we are happy to bring you an exciting Tim Holtz inspired make by guest designer Tami Bastiaans - playswellwithpaper.
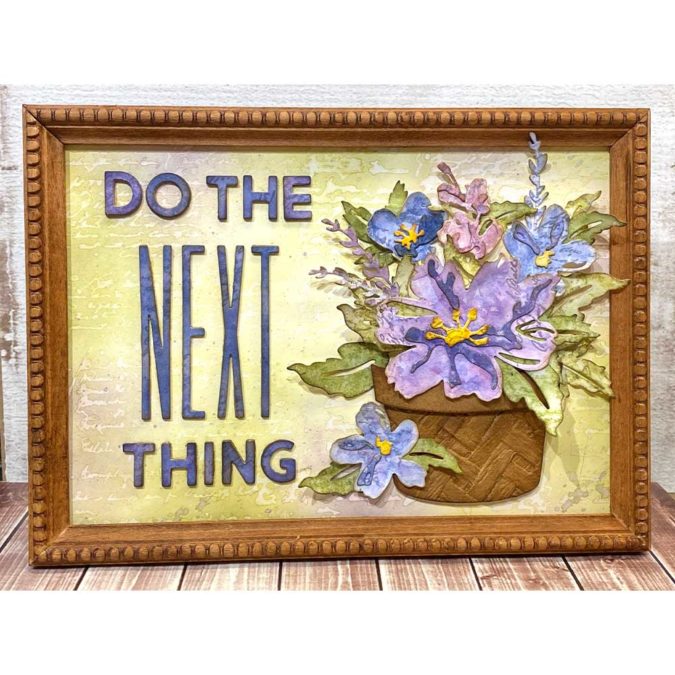
Hello fellow makers! Im so excited to be able to bring this project to you today using Tim Holtz Sizzix Chapter 1 2021 dies. I loved the beauty of the new Brushstroke Flowers #2 Thinlits and thought it would pair well with the Potted die from 2019. With the new Intwined 3D folder, I just knew I needed to give Potted an update and turn it into a basket.
Once I had the flower arrangement, I was kind of stumped, and couldnt think of what to add to the left side. I was creating during a time when the world seemed to be out of control. I found myself so distracted by the chaos that I was struggling to finish this project and even to accomplish much of anything else. Have you ever found yourself feeling that way? Well, thankfully a line from a poem came to mind that I have heard recited many times over the years by a mentor of mine, Do the next thing. When you dont know what to do, just do the next thing, what ever it is. Get dressed, do the dishes, eat, run that errand, write that note, put away those clothes...whatever it is right in front of you, get up and do it. Then do the next thing, and the next and soon you are being productive and moving forward, no longer stuck. Im thankful for the reminder this décor piece brings, to Do the next thing, .

Its a fairly simple piece to assemble, so lets get started with the how to.
Products used:
Brushstroke Flowers #2 Thinlits, Alphanumeric Stretch Upper by Tim Holtz, Bold Potted Idea-ology Framed Panel and Stampers Anonymous Ledger Script CMS241.
Instructions:
1.Stain the frame and the side and back of the panel with Brushed Corduroy Distress Stain. You can brush this on with a paint brush or spray it, but that results in a lot of waste, so a brush may be your best bet.
2.Cut a pot and rim out of the potted die in both chipboard and Distress Heavystock Kraft cardstock. Ink the Kraftstock with Brushed Corduroy and then edge it with Walnut stain.
3.Then run the large piece through the 3D Intertwined embossing folder.
4.Attach the Intertwined piece to the chipboard pot and then the flat rim to the chipboard rim.
5.Ink all the edges one more time. Set it aside.
6.Cut a piece of white heavy stock to fit the panel, then ink it with Fossilized Amber.
7.Lightly add some Peeled Paint Distress Ink.
8.Finish with a tiny bit of Dusty Concord.
9.You want to add a bit of subtle interest, so you need a background stamp. I used one of the stamps from Ledger Script CMS241 from Stampers Anonymous. Sizzix Stamps.
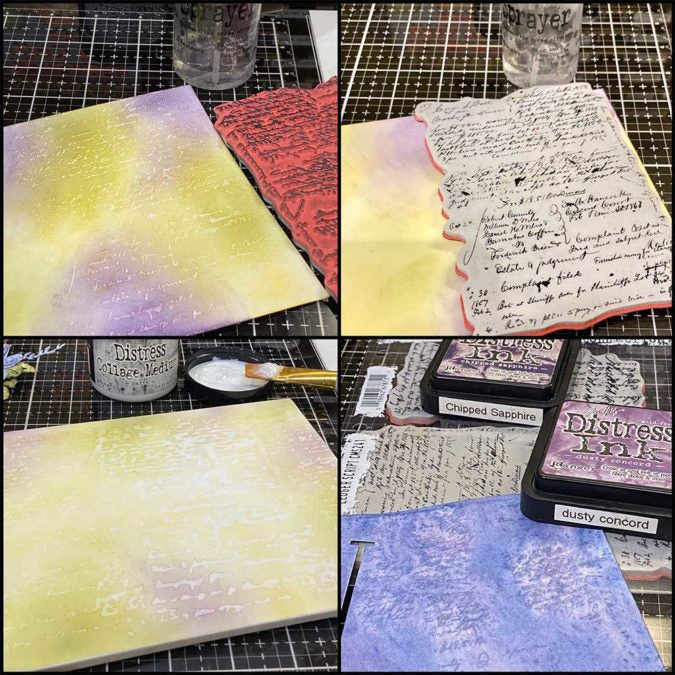
10.Spray the background stamp with some water. Dont get it too wet or it will just make a mess. You want an even mist all over the stamp. Lay the stamp into the background. lightly pressing it onto it and let it sit for a minute.
11.Lift the stamp off and dry. It should make a light pattern where the ink reacts with the water.
12.Do this across the entire piece and then attach it to the panel with Distress Collage Medium.
13.On two other pieces of White Heavy stock, randomly stamp bits of the Ledger Script stamp in Distress Hickory Smoke Archival Ink. Then on one of them, color the entire piece with Distress Ink in Chipped Sapphire and Dusty Concord.

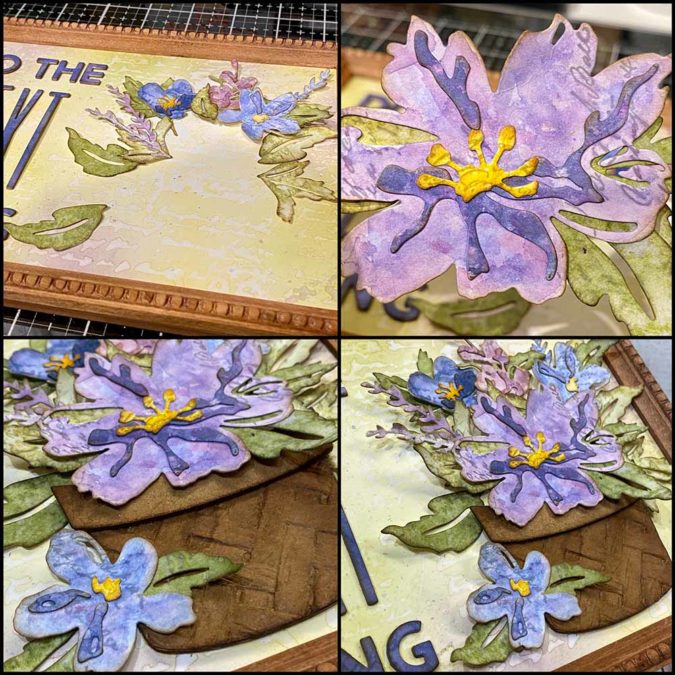
14.With the other piece, Cut out the flowers and leaves from the Brushstroke 2 set. I cut multiples of the leaves and all the smaller flowers.
15.I made a palette on my Mixed Media Mat with all of the Distress Inks listed above: Fossilized Amber, Dusty Concord, Milled Lavender, Peeled Paint, Chipped Sapphire, Wilted Violet, Seedless Preserves, Shaded Lilac, Shabby Shutters.
16.Color each of the flowers and leaves with a water brush and the Distress Inks, then edge with Walnut Stain and assemble them.
17.Arrange some of the leaves and flowers on the background and then add the baskets and the large flower. Once you are happy with the arrangement, adhere all the parts, attaching some with dimensional adhesive so that there are levels and texture.
18.Get the dark blue paper back out that was made with the Chipped Sapphire and Dusty Concord. Use this to cut out your sentiment. I used Stretch lowercase and Bold Alphanumeric.
19.Cut several of each letter from black cardstock. Attach 3 black letters together and top with the blue letter. This will make the letters stand out so well from the background.
20.Arrange the letters to fit and adhere them to the left side of the frame.
21.This can be a décor piece to serve as a reminder to Do the Next Thing, or it will fit perfectly on a 5x7 or 5.5x8.5 card to send to a friend.
Thank you so much for following along with this tutorial and I hope you enjoy making one of your own! Share your makes with us using #mymakingstory, for a chance the be featured on our social media!


