


Joy Riders Starry Night Card
Hey, its Sizzix Designer Josh! By now, anyone who follows me knows I love two things, Moons and illustrative character dies! The Joy Riders die set by Olivia Rose from Chapter 2 2022 just fills me with joy as it combines an illustrative style with forest animals and bikes! For my make, I decided this would look fantastic on a painted starry background and yes, why not add a moon! I hope you enjoy reading my Joy Riders Blog on how I create a Starry Night Card.
What you will need:
- Sizzix® Big Shot® Machine (660200) or Sizzix® Big Shot® Plus Machine (660340) or Sizzix® Big Shot Express Machine (660540 / 660850) or Sizzix® Big Shot® Foldaway Machine (662500) or Sizzix® Big Shot Switch Machine 663650
- Sizzix Thinlits Die Set 11PK - Joy Riders
- Sizzix Effectz - Creamy Matte Acrylic Paint, Black, 60ml
- Sizzix Effectz - Creamy Matte Acrylic Paint, Limoncello, 60ml
- Sizzix Effectz - Creamy Matte Acrylic Paint, Cherry Blossom, 60ml
- Sizzix Effectz - Creamy Matte Acrylic Paint, Bluebell, 60ml
- Sizzix Making Essential Foam Tape
- Sizzix Effectz - Multimedia Mat
- Sizzix Making Essential - Express Glue - 120ml
- Ranger Inks
- Brayer
- Palette knife
Step-by-step instructions
Step 1
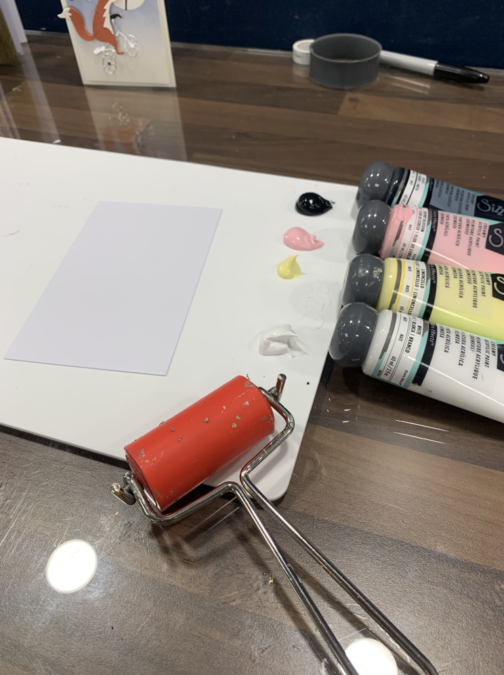
Begin by cutting a piece of white cardstock with the dimensions of 3 ½ inches x 6 ¾ inches. On your Multimedia Mat, add a splodge of each colour of the Sizzix Creamy Acrylic Paints that you will use for this project. When adding the colours to your Multimedia mat the colours should go from dark at the top to light at the bottom, this will help you to create a blended night sky and sunset effect. For my make, I used black, cherry blossom, limoncello and white.
Step 2
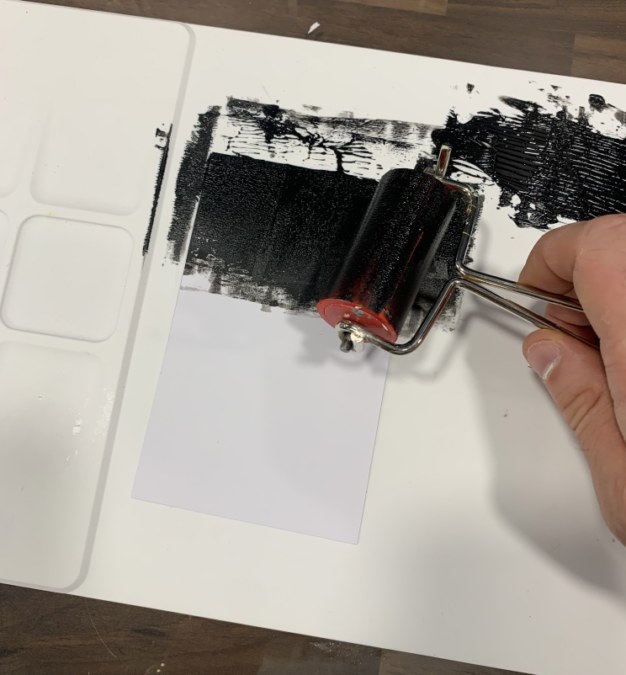
Starting at the top, use your brayer to apply the black paint to your rectangle of card. You dont need much paint on the brayer as you can keep adding to fill in any gaps but try to make sure there is an even coverage over the rubber wheel of the brayer by rolling it over a scrap piece of card first and lifting to allow the wheel to spin a few times. On your cut out card colour the top two thirds of the card.
Step 3
As the paint dries, using the same technique, begin adding your other colors to the bottom third, moving upwards to create a subtle blend. Either leave time for the paint to dry or dry with the Sizzix heat tool.

Step 4
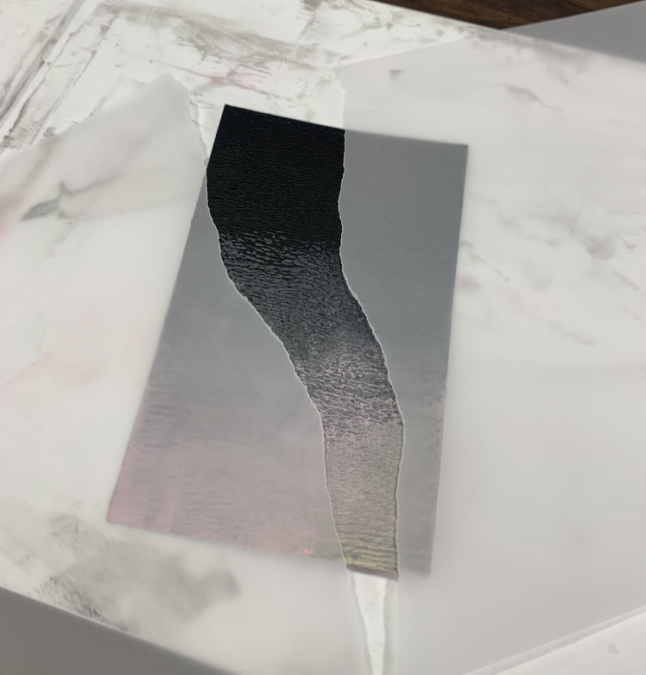
Once you are happy with the blend and the paint has dried, tear a sheet of the Sizzix Stencil Film and place it so that there is a gap running from the top to the bottom of the card. This should be an organic shape rather than a straight gap.
Step 5
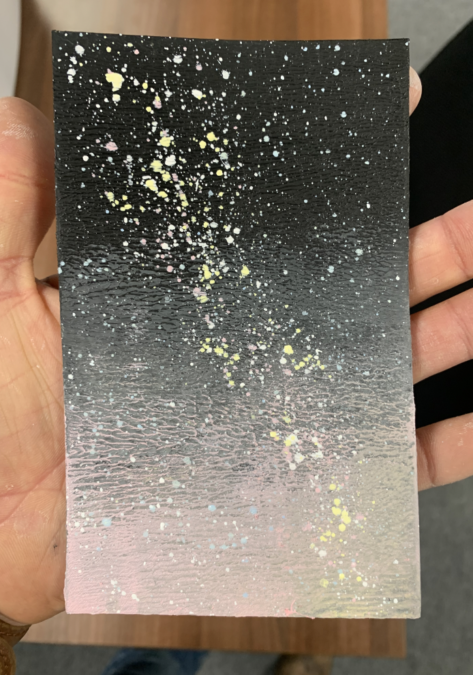
Next, apply some white creamy acrylic paint to your Multimedia Mat, spray it with water and mix with your palette knife to water it down. Pick some of the watered down paint on your palette knife and flick across the covered card rectangle so that the exposed strip gets covered in white splatters.
Repeat this step with pink and yellow paint.

Step 6
Take away the stencil film and cover the rest of the card element in paint splatter this will give the impression of the Milky Way galaxy showing through the stars.
Step 7
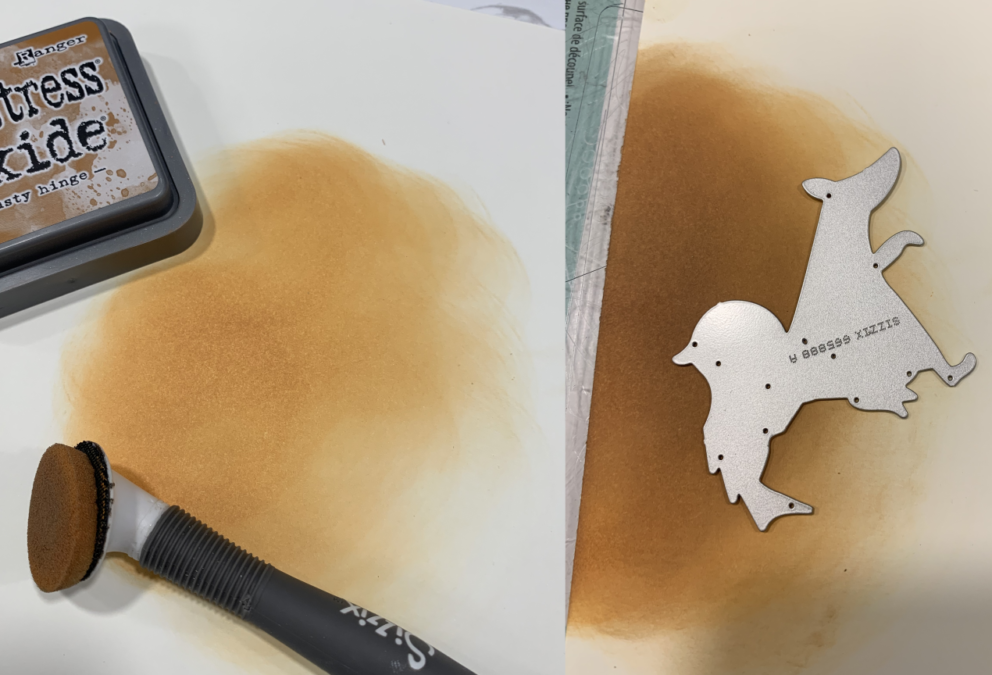
Take some of the Ranger distress inks and oxides and create a blend on a white sheet of cardstock. Then, die cut your fox element from the blended area using the Joy Riders Die Set. You may need to cut it a few times from lighter and darker areas of the blend to get a good contrast between the layered elements.
Layer up your fox element and cut the small bike element from Sizzix ivory card stock.
Step 8
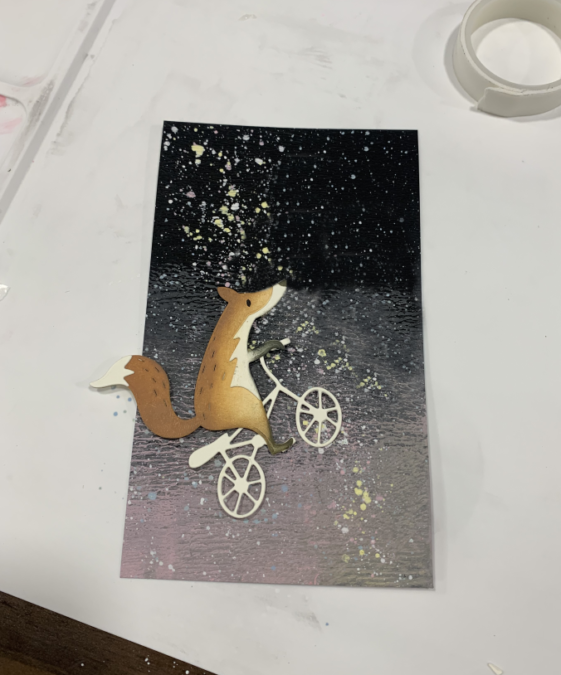
Begin layering up your die cut elements on your card using foam tape. Make sure to leave room to place the moon element so that the Foxs nose slightly overlaps.
Step 9
Stamp or print your sentiment on ivory card stock and cut around with a Framelits circle measuring 2 inches in diameter. I chose to print my sentiment because I wanted to tell a story between the composition and sentiment.

Step 10
Finally, add your layered elements to the front of your Starry Night card base and step back and look at your wonderful creation!

Thank you so much for ready this Joy Riders Starry Night Blog, use my code JOSH20 for 20% off all the items I have used today! Also remember to use the hashtag #mymakingstory, I would love to see you wonderful creations!
-
Posted in
Cardmaking, Tutorials and Inspiration


