Sending Layers of Lattice!
Dont you just love receiving a card in the post? Or a special, handmade note attached to a gift? Sending Layers of Lattice would brighten up anyones day, whilst bringing joy to their heart.
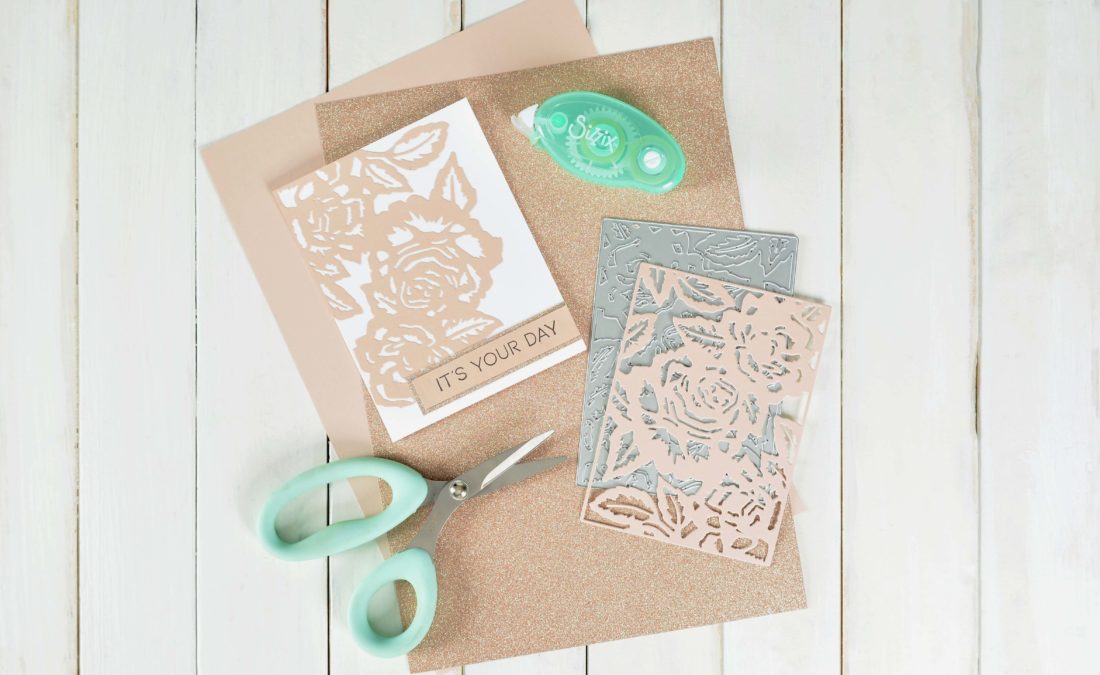
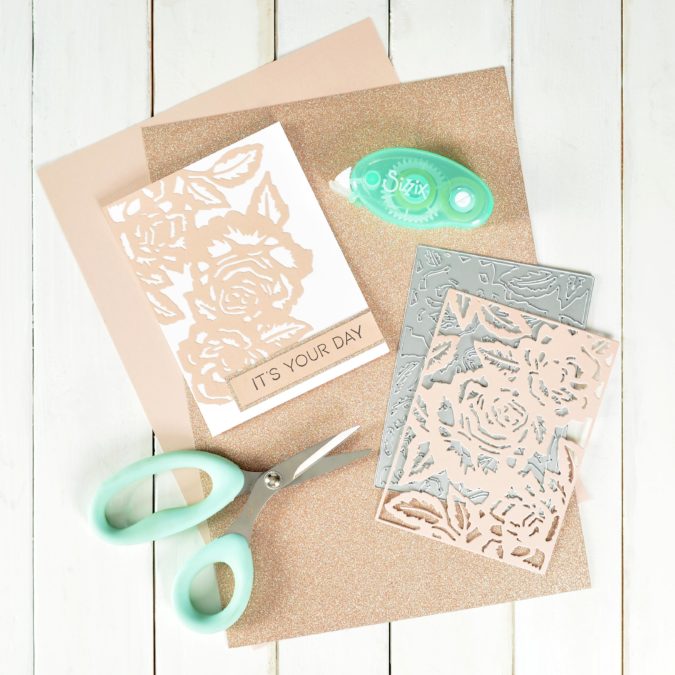
The detailed Floral Lattice Thinlits® Die Set is absolutely exquisite. Whether you layer it together or use one of the layers on its own, the finished project is stunning.
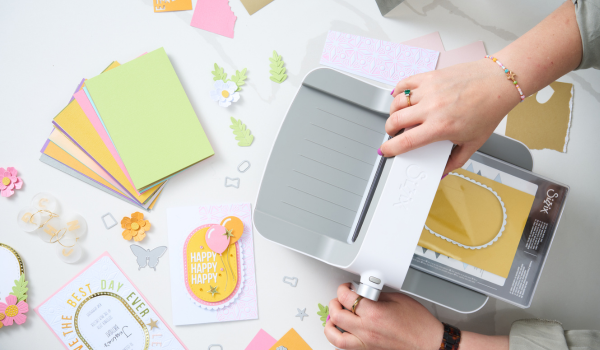
The Sizzix® Rose Gold Big Shot® Machine Starter Kit, not only includes the Floral Lattice Thinlits Die Set, but it also includes assorted sentiment Thinlits and an assortment of rose gold and ivory opulent Cardstock - the glitter, pearl and mirror finishes bring out the detail of the Floral Lattice Die Cutting Set even more. This list doesn't stop there, a wonderful rubber stamp assortment of sentiments is also a part of the bundle as well and they finish off this Layers of Lattice card beautifully.
With a combination of the rose gold opulent Cardstock, the Floral Lattice Die Set and a simple stamped sentiment, wouldnt you love to be the one Sending Layers of Lattice? Bring joy to their heart with that special delivery in the mailbox. Its the best feeling ever for both of you!
What you need:
Sizzix® Big Shot® Machine Starter Kit (Gray & Rose Gold) w/ Standard Platform
Sizzix® Making Essential - Permanent Adhesive Roller
Sizzix® Making Essential-Adhesive Sheets, 6x6, Permanent, 10 Sheets
Permanent Black Ink Pad
Acrylic Stamp Block
White Cardstock
How to make:
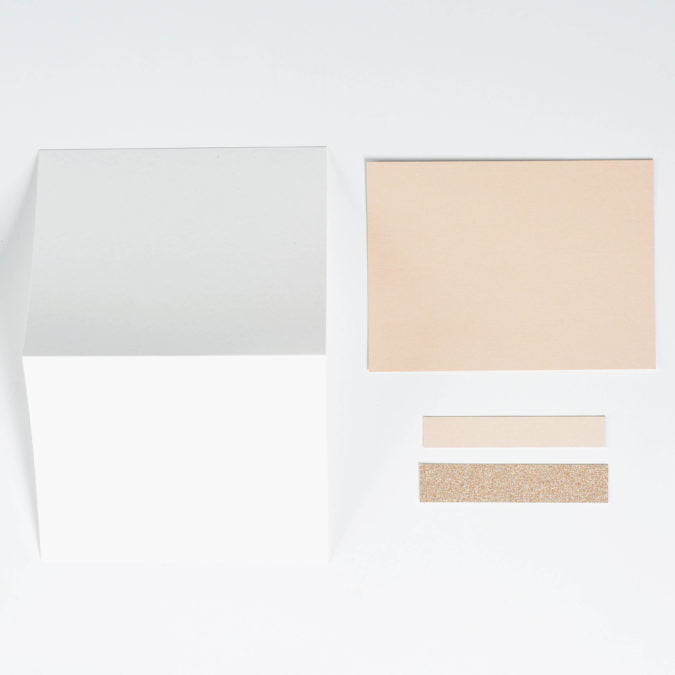
Trim the rose gold opulent pearl Cardstock to 4.5" x 6". Trim one narrow piece of the rose gold opulent glitter and pearl Cardstock long enough to fit desired rubber stamp sentiment, making sure the glitter strip is a bit larger to create a border. Trim a piece of white cardstock to 8.5 x 5.5, fold it in half to create a card base.
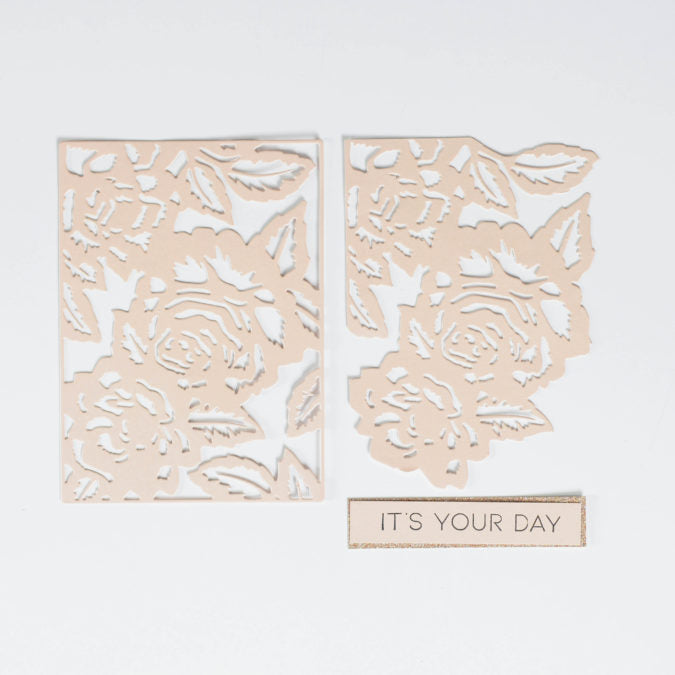
Adhere the adhesive sheet to the back of the larger piece of rose gold opulent pearl Cardstock. Die cut the least intricate Floral Lattice Thinlits Die (the one with fewer blades) out of the rose gold pearl opulent Cardstock, making sure the blade is against the non-adhesive side of the Cardstock. Keeping one corner with straight edges, trim around rose gold pearl Floral Lattice die cut as shown.
Peel off the backing of the pearl finish die cut piece and adhere straight corner edges to the top left corner of the white card base.

Select desired rubber stamp sentiment and stamp onto trimmed rose gold opulent pearl Cardstock. Once dry, adhere to trimmed rose gold opulent glitter Cardstock strip, using the Sizzix Adhesive Tape Roller. Adhere the assembled sentiment strip to the card front, to the right.
All set! Now...who's the lucky recipient of your Layers of Lattice card? They'll be impressed with the detail and you'll be smiling from ear to ear at the simplicity of making it!
Thank you so much for reading this Sending Layers of Lattice blog! I hope you've been inspired by the goodness included in your starter kit. We absolutely love seeing what you create. Remember to tag us with any of your Sizzix makes. Be sure to use the hashtag #mymakingstory. We can't wait to see it all!
Thank you for reading this blog. You can purchase the product Im using here today with a 20% off discount when you use the code DEBBIE20. To redeem your offer and to check out the Terms & Conditions.
-
Posted in
Cardmaking, Tutorials and Inspiration