Tim Holtz: Mixed Media Snowflake Card
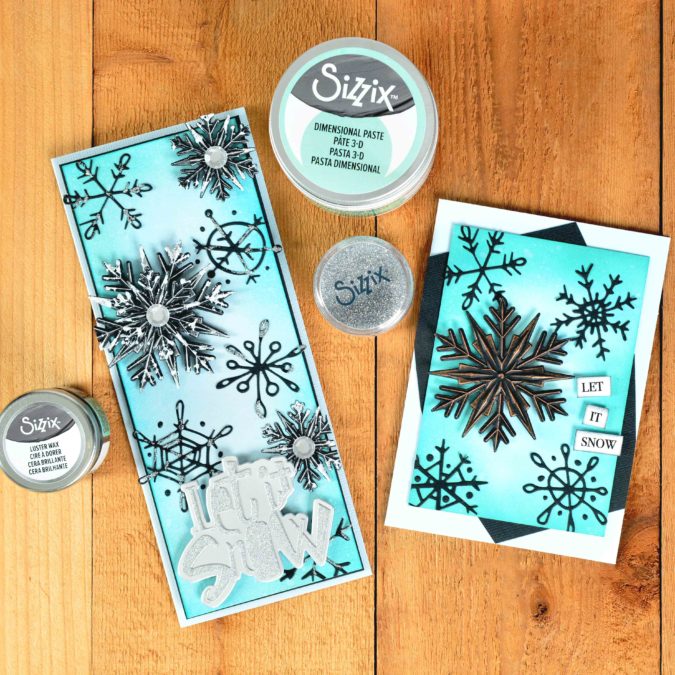
Winter flurries and chilly breezes, is there anything more exciting! I definitely love crafting for Christmas & Winter and all things Tim Holtz, so with the release of Tim's newest Sizzix Die Sets I could not wait to make a seasonal winter card using the Sizzix Snowflake 3-D Impresslits and Scribbly Snowflakes Thinlits Die Set. Check out the step by steps below to see how I created this Mixed Media Snowflake card.
What you will need:
- Sizzix® Big Shot® Machine (660200)
- Sizzix® 3-D Impresslits Embossing Folder Snowflake by Tim Holtz® (665376)
- Sizzix® Thinlits® Die Set 6PK Festive Words by Tim Holtz® (665575)
- Sizzix® Thinlits® Die Set 8PK Scribbly Snowflakes by Tim Holtz® (665582)
- Sizzix Effectz Dimensional Paste, White, 150ml (664573)
- Sizzix Effectz Luster Wax, Silver, 20ml (664811)
- Sizzix Making Essential Adhesive Sheets, 6" x 6", Permanent, 10 Sheets (656802)
- Sizzix Making Essential Express Glue, 120ml (664576)
- Sizzix Making Essential Foam Tape (663709)
- Sizzix Making Essential Fine Biodegradable Glitter, Silver, 12g (665457)
- Sizzix Making Essential Permanent Adhesive Roller (663474)
- Sizzix Making Tool Multi-Tool Starter Kit (662875)
- Sizzix Making Tool Scissors, Large (664819)
- Sizzix Multi-Tool Accessory Blending Tool Head w/Replacement Sponge (662880)
- Sizzix Surfacez Cardstock, 8 1/4" x 11 3/4", 20 Assorted Colors, 80 Sheets (663007)
- Sizzix Surfacez 10 Neutral Colored Cardstock, 60PK (663780)
- Sizzix Surfacez The Opulent Cardstock Pack, Silver, 50PK (664533)
- Palette Knife
- Paper Trimmer
- Ranger® Distress® Ink Pads (Evergreen Bough, Peacock Feathers, Tumbled Glass)
- Rhinestones (Clear)
How to make the Tim Holtz - Mixed Media Snowflake Card:

- Cut a slimline card base panel out of Sizzix Arctic Sky Cardstock (7" x 8 1/2") and fold the panel in half to create the card base. Cut a 3 1/4" x 8 1/4" panel of black cardstock.
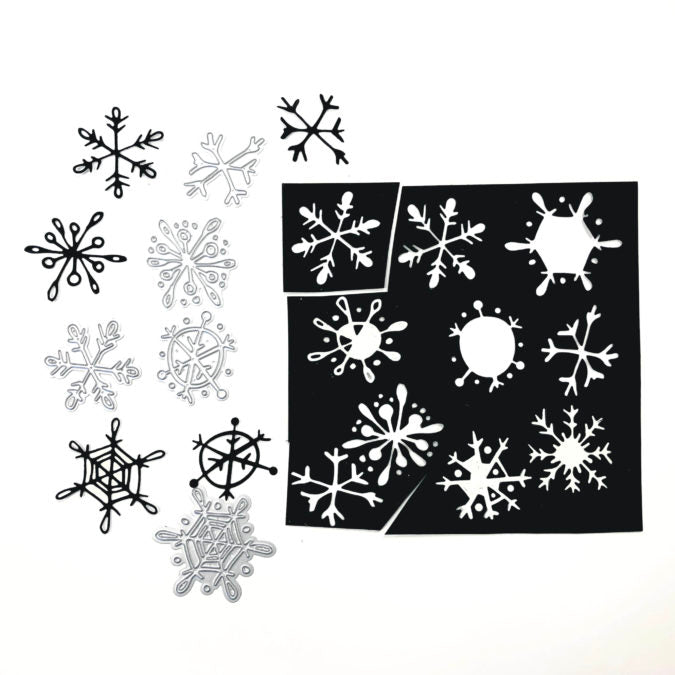
2. Die-cut out of adhesive-backed black cardstock a desired selection of snowflakes from the Scribbly Snowflakes Thinlits Die Cutting Set.
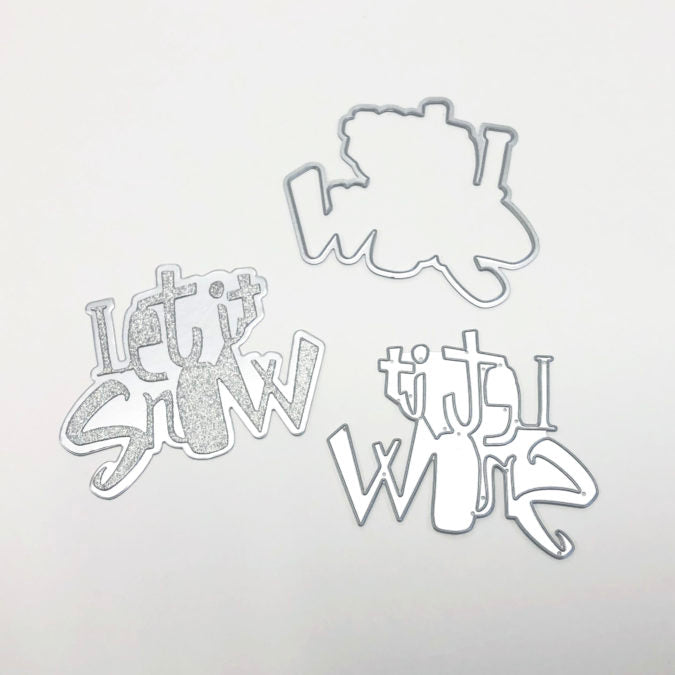
3. Die-cut out of adhesive-backed Silver Glitter Opulent cardstock the phrase "Let it Snow" and out of matte silver Opulent cardstock the matching shadow from the Festive Words Thinlits Die Set. Adhere the glitter sentiment to the matte shadow element.
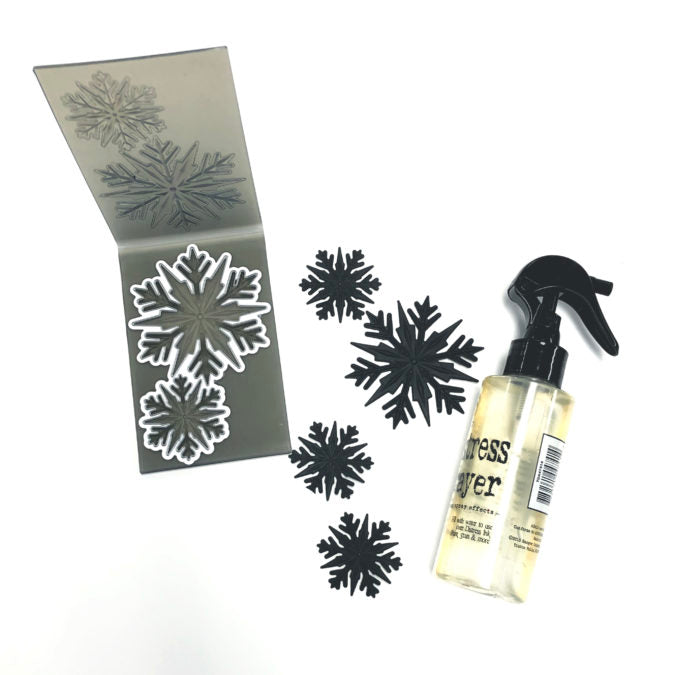
4. Using the Sizzix Snowflake 3-D Impresslits Embossing Folder, emboss and die-cut three small snowflakes and one large snowflake. Be sure to lightly mist the cardstock with water before cutting and embossing to open up the fibers of the paper and allow for a clean, deep emboss. Set aside the die-cuts to dry.
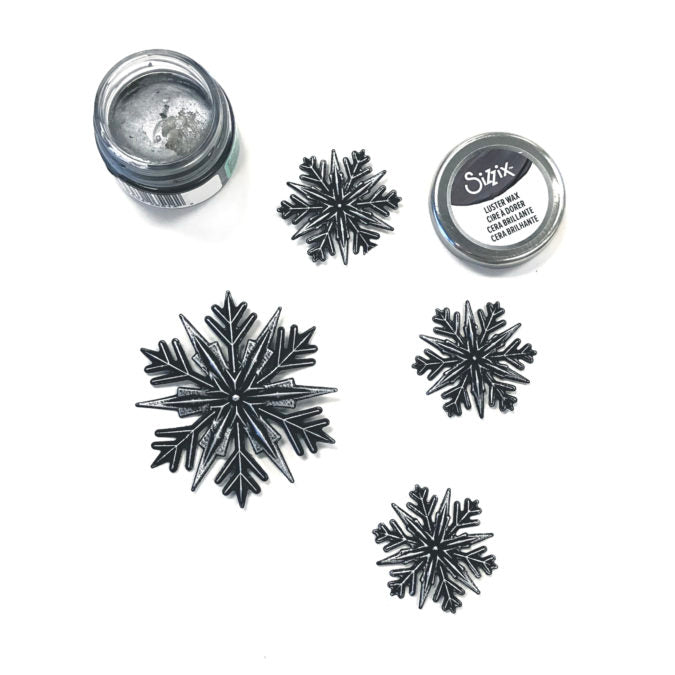
5. Once dry, use a finger to apply Sizzix Silver Luster Wax to the top of the emboss on all of the die-cut black snowflakes. It's always best to tap off excess wax on a scrap piece of paper before applying to the embossed edges. Build the wax to a desired effect on each snowflake by applying various layers.
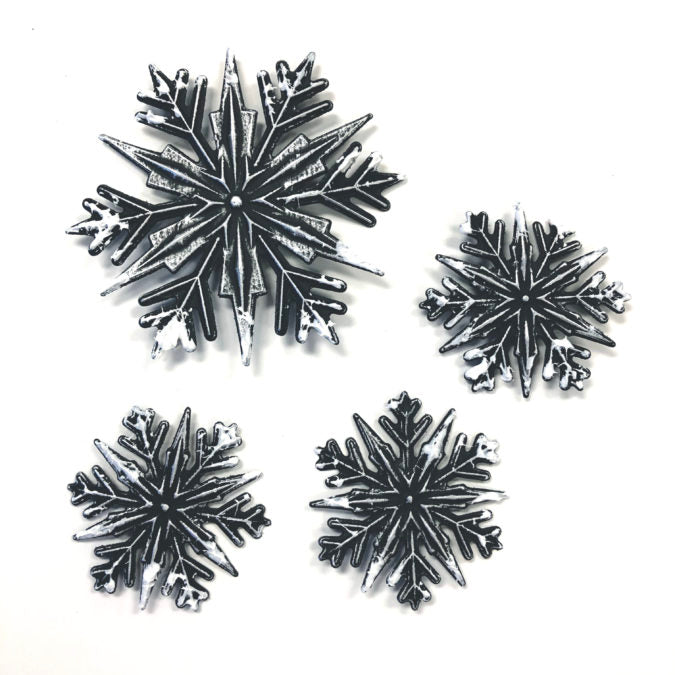
6. With a palette knife, stipple Sizzix Effectz Dimensional Paste where desired on the snowflakes to create the appearance of frost or snow.
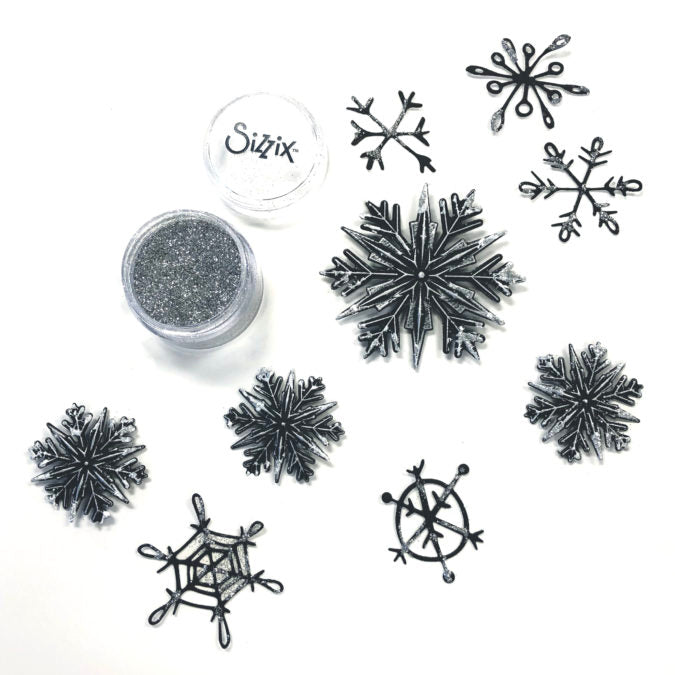
7. While the Dimensional Paste is still wet, sprinkle Silver glitter across the top of the paste so that it will adhere to the paste while drying. With Express Glue, apply small amounts of liquid adhesive where desired on the die-cut Scribbly Snowflakes. Then sprinkle Silver glitter on top of the liquid adhesive. Set aside all snowflakes to dry.
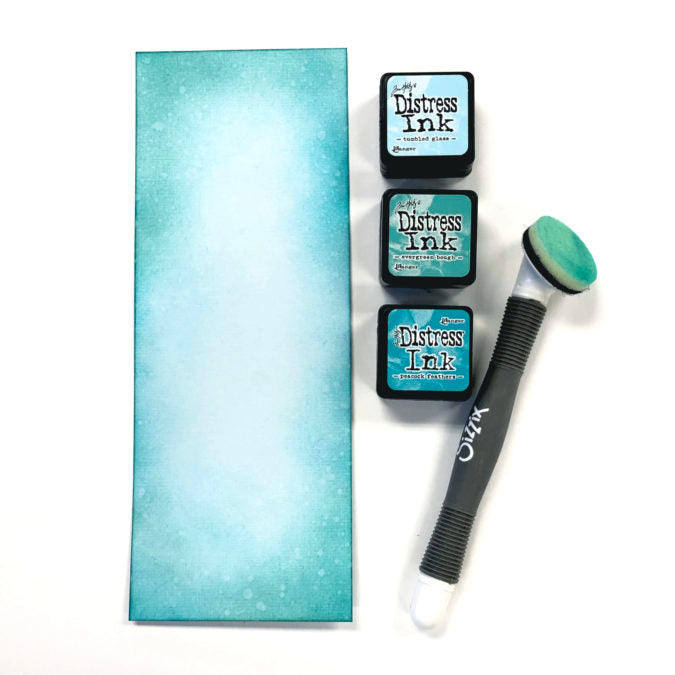
8. Cut a 8 1/8" x 3 1/8" panel of Arctic Sky cardstock. With the Sizzix Blending Tool, first blend Tumbled Glass from the edges of the panel towards the center, leaving a light layer in the middle. Then ink the edges of the panel with a mix of Evergreen Bough and Peacock Feathers Distress Ink, making sure to keep the center of the panel light and the edges darker. To create a mottle effect, spray the panel with water and blot away the excess water. Set the panel aside to dry.

9. Stack and adhere one small embossed snowflake to the center of the large embossed snowflake with liquid adhesive. Arrange all the snowflakes as desired along the inked panel, adhering some of the embossed snowflakes to the panel with foam tape. Be sure to leave a space for the sentiment near the bottom of the panel. Our Tim Holtz: Mixed Media Snowflake Card isn't far from completion!
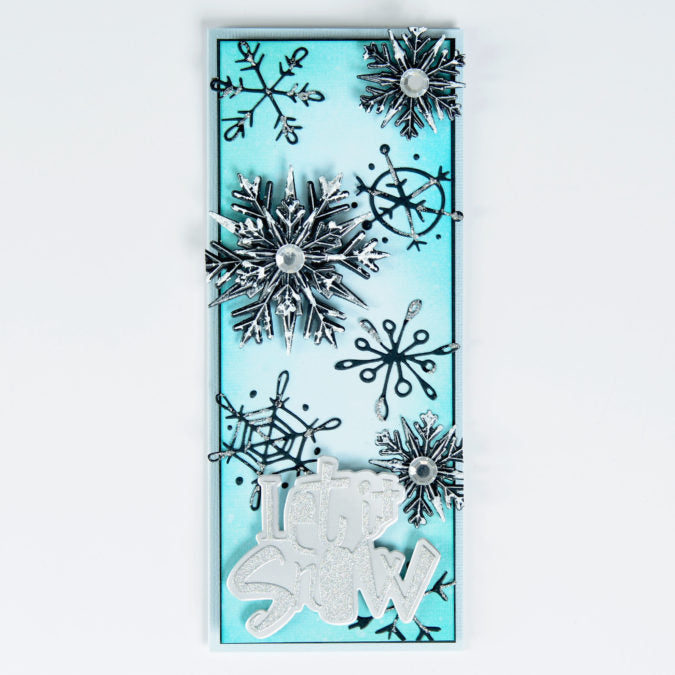
10. Adhere the "Let it Snow" sentiment to the bottom edge of the inked panel with foam tape. Center and adhere the inked panel to the black panel from Step 1 with double-sided tape. Center and adhere the layered panel to the card front with foam tape.
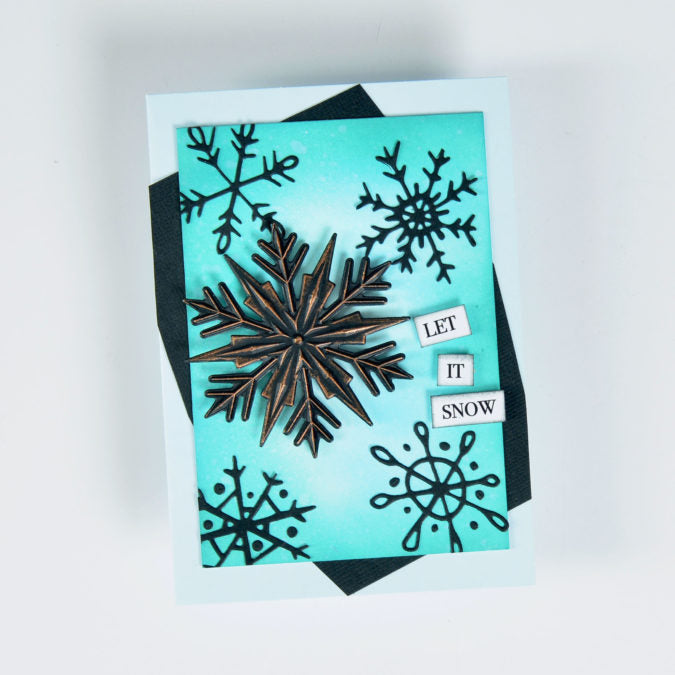
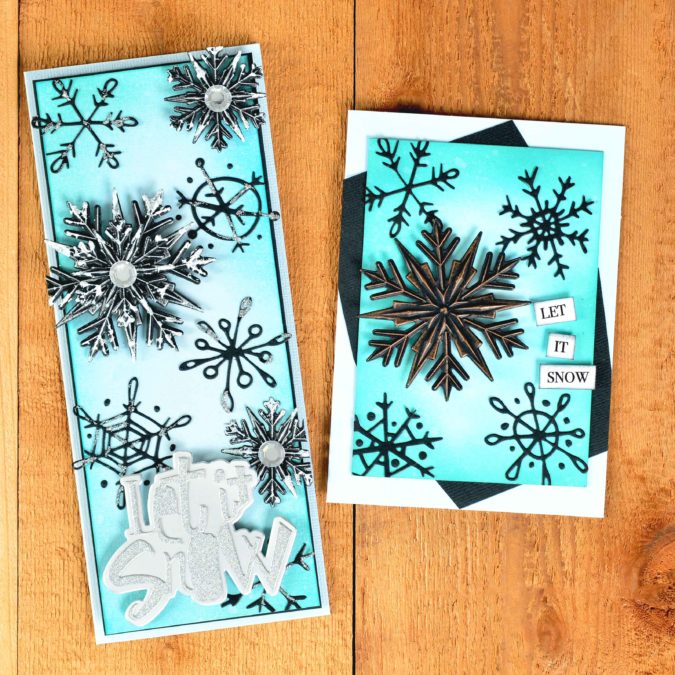
If a simple layout is preferred, try applying a luster wax to one large snowflake and keep your background clean with Scribbly Snowflake die-cuts minus additional textural effects. The great thing about these dies is that they can be amplified to include mixed media, but they are great shapes to stand alone for unique backgrounds.
I hope you have enjoyed this little tutorial! Are you ready to start making for the winter holidays? If you make anything using these die sets be sure to tag us with #mymakingstory so that we can share your creations on our social channels.
If you like anything you've seen me use in this blog and would like to purchase it, you can get 20% off on the product when you use the code: ALEXIS20. You can redeem this offer on either Sizzix.co.uk or Sizzix.com and check out the Terms & Conditions.
Until next time, happy crafting!
Crafted by Sizzix Designer Alexis Trimble
-
Posted in
Cardmaking, Tutorials and Inspiration